|
Modifications > Nav Center |
|
|
 So
I singlehand my boat almost all the time, meaning there often isn't time to
jump down into the cabin to flip one of the little toggle switches on the
old Bristol switch board, and I started thinking about moving those switches
close to the cockpit seat. That got me thinking about adding a place for the
radio, GPS, radar and anything else, all visible from planting my ass on the
cockpit cushion. A sketch on the back of a napkin at the Dome in downtown
St. Pete led to formal plans and I wound up rewiring the boat as a part of
building this cabinet. As you can see from the photo, all exterior switching
is handled here, as well as red courtesy lights below. So
I singlehand my boat almost all the time, meaning there often isn't time to
jump down into the cabin to flip one of the little toggle switches on the
old Bristol switch board, and I started thinking about moving those switches
close to the cockpit seat. That got me thinking about adding a place for the
radio, GPS, radar and anything else, all visible from planting my ass on the
cockpit cushion. A sketch on the back of a napkin at the Dome in downtown
St. Pete led to formal plans and I wound up rewiring the boat as a part of
building this cabinet. As you can see from the photo, all exterior switching
is handled here, as well as red courtesy lights below. |
|
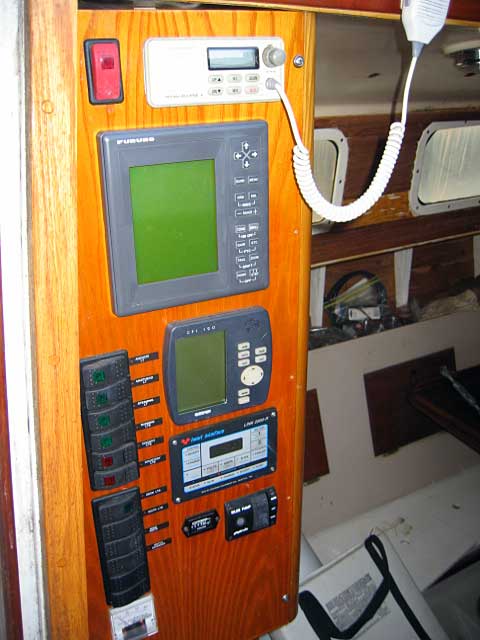
 The
nav cabinet protrudes about 12-inches into the cabin. It is built of ash.
The front panel is removable to get at all the wiring and there is a back
door on the port side of the cabinet. The red switch aft of the radio is the
main and only ignition switch--the equivalent of turning the key on the
Yanmar instrument panel to On. I disconnected the ignition switch from the
panel (I was always afraid I would have the key in the ignition and for some
reason mistakenly break it off in the lock). To start the engine, just flip
the switch to the up position and press the starter button, and you're
running. The
nav cabinet protrudes about 12-inches into the cabin. It is built of ash.
The front panel is removable to get at all the wiring and there is a back
door on the port side of the cabinet. The red switch aft of the radio is the
main and only ignition switch--the equivalent of turning the key on the
Yanmar instrument panel to On. I disconnected the ignition switch from the
panel (I was always afraid I would have the key in the ignition and for some
reason mistakenly break it off in the lock). To start the engine, just flip
the switch to the up position and press the starter button, and you're
running. |
|
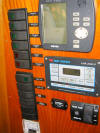 In
this shot you can see the switch labels, GPS, Link 2000, hour meter and the
automatic switch for one of the pumps. The small meter at the bottom was for
the wind generator, but I no longer use one. The hour meter has about 60
hours on it I think--I don't like using the engine. In
this shot you can see the switch labels, GPS, Link 2000, hour meter and the
automatic switch for one of the pumps. The small meter at the bottom was for
the wind generator, but I no longer use one. The hour meter has about 60
hours on it I think--I don't like using the engine. |
|
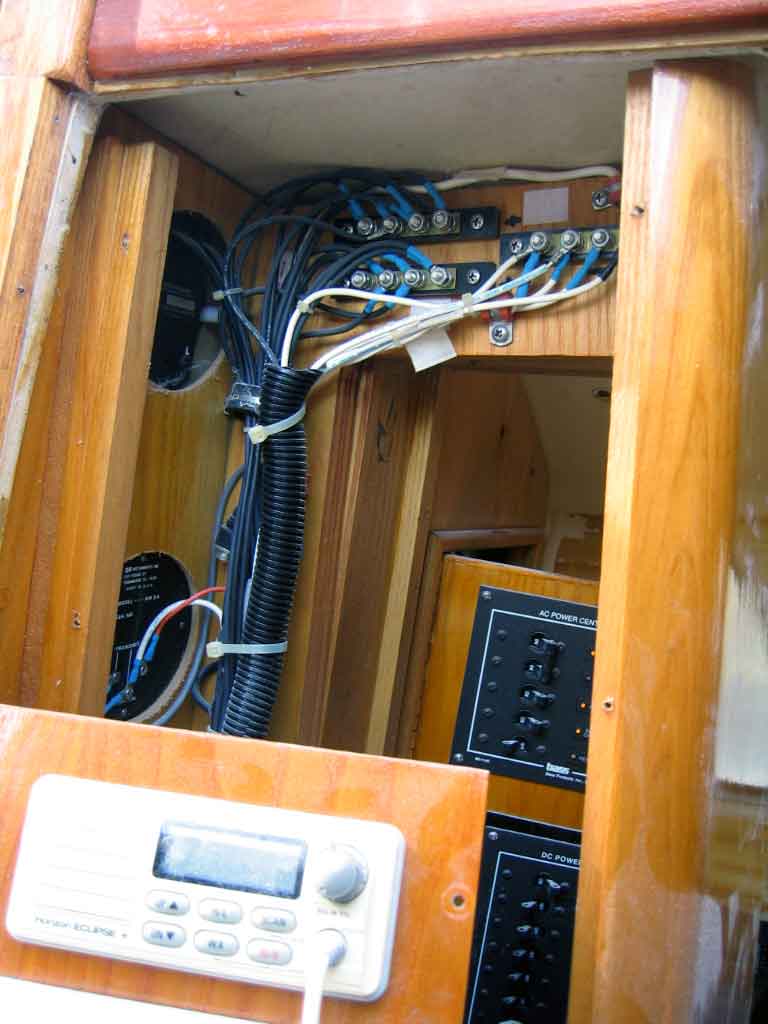
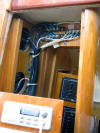
 Behind
the nav cabinet is the main circuit panels, one for shore power and one
12-volt panel. Behind the door are the main house bus bars where everything
branches off. Behind
the nav cabinet is the main circuit panels, one for shore power and one
12-volt panel. Behind the door are the main house bus bars where everything
branches off. |
|
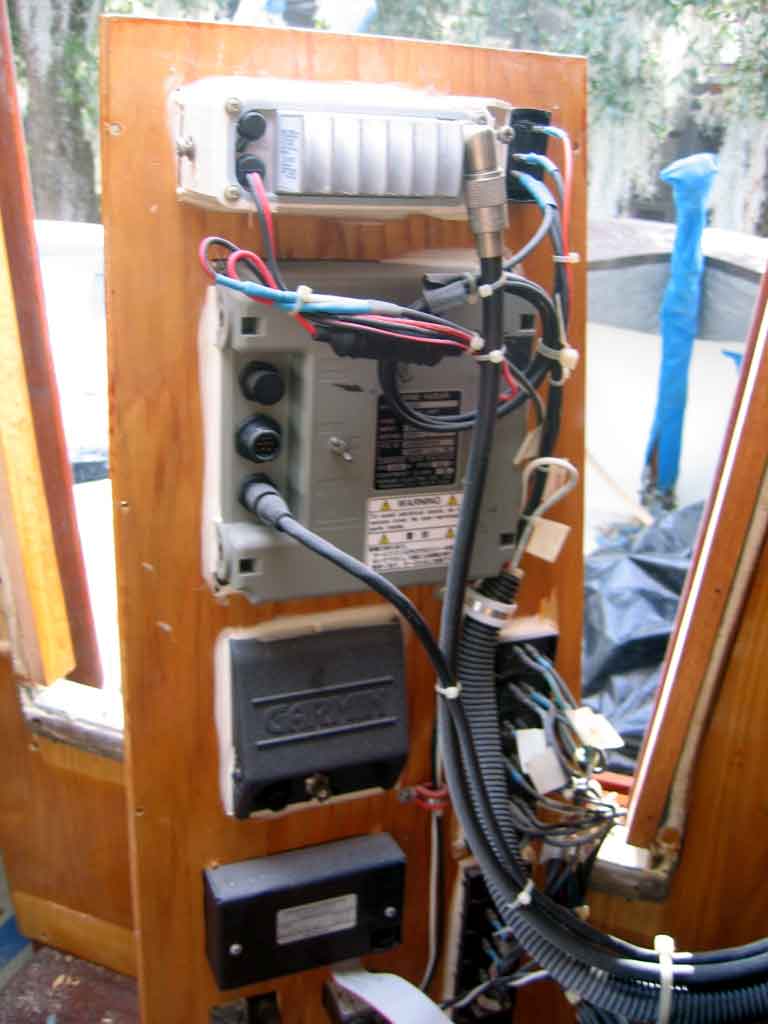
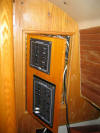
 The
front instrument panel opened showing some of the wiring (positive and
negative buses for the switch panel. Instead of wiring each light to a
separate circuit breaker and using the breaker as the switch for the light,
I wired the Bristol with actual circuits, protected by properly sized
breakers and the lights actuated by waterproof switches. The
front instrument panel opened showing some of the wiring (positive and
negative buses for the switch panel. Instead of wiring each light to a
separate circuit breaker and using the breaker as the switch for the light,
I wired the Bristol with actual circuits, protected by properly sized
breakers and the lights actuated by waterproof switches.
 Here
is the backside of the front instrument panel. Here
is the backside of the front instrument panel. |